Checklist
After working through the previous section of the guide on gathering information, you will have compiled a number of images and text ready to copy and paste into place, as you work through this section of the guide. Before you begin, check you have the following:
Images for all sections of your website, including logo and favicon
Your Site Basics
A list of locations
Details for key Churches in each location
Details for key Community Groups in each location
Details for key people
Roles for key people in each church or community group
Details for key activities
A list of people who will be maintaining the content on the website
A regular service pattern
A list of email addresses, with associated passwords, to transfer or create
Click here to download a Word Document, to help with information gathering
1. Secure Your Site
To make your site secure, you'll need to add at least one new administrator, and then delete the default administrator.
Simply follow the steps below, by clicking on the numbers or the arrows at the top of the box.
Navigate to your brand new website
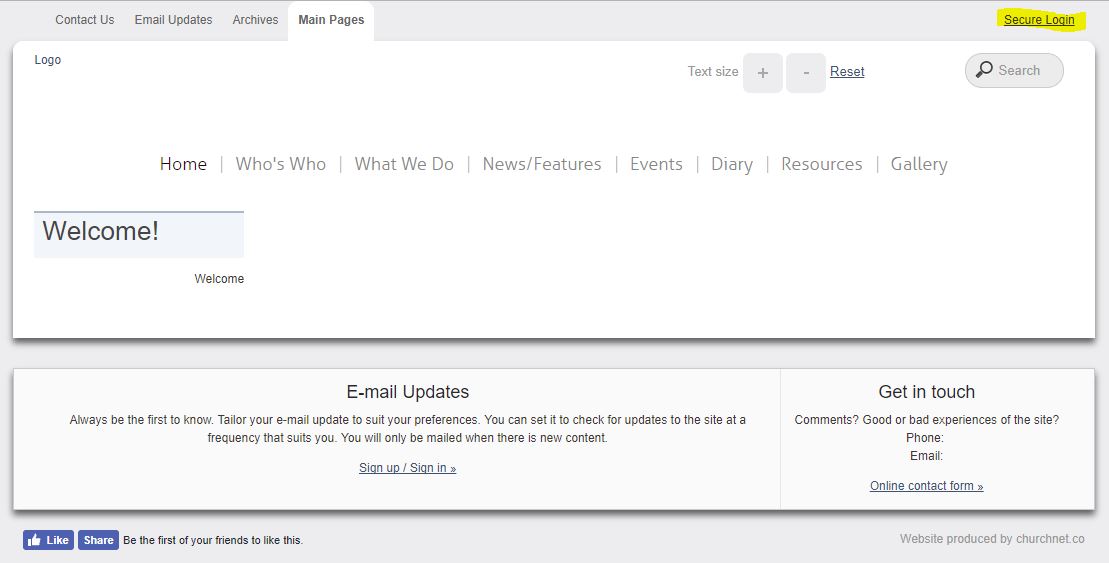
This is what your site should look like to begin with.
Click the "Secure Login" link at the top right of your screen (or in the top drop-down menu on a smaller device).
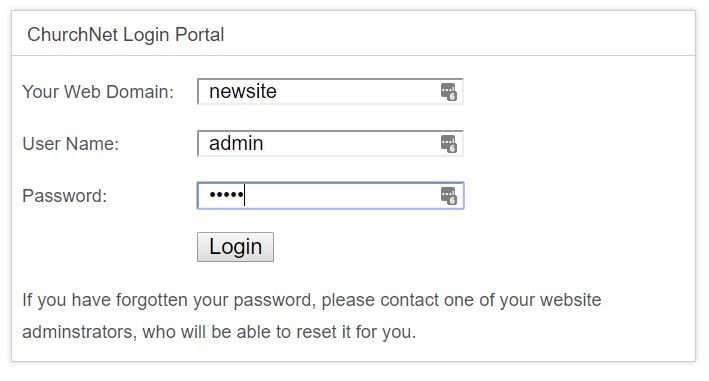
Login as the default administrative user
Your site comes with just one administrative user, which enables you to set up the site. Once you've clicked "Login", enter "admin" for both username and password, and then click the light blue "Login" button.
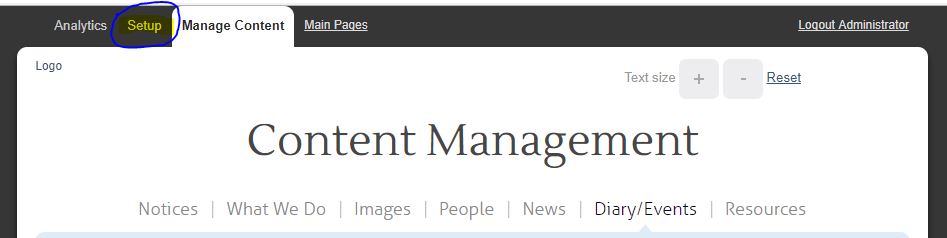
Go to setup pages
Once you're logged in, click on "Setup" to access the setup pages, where the initial work in this section of the guide will be done.
Go to "Web Users" section
After clicking on "Setup", click on "Web Users".
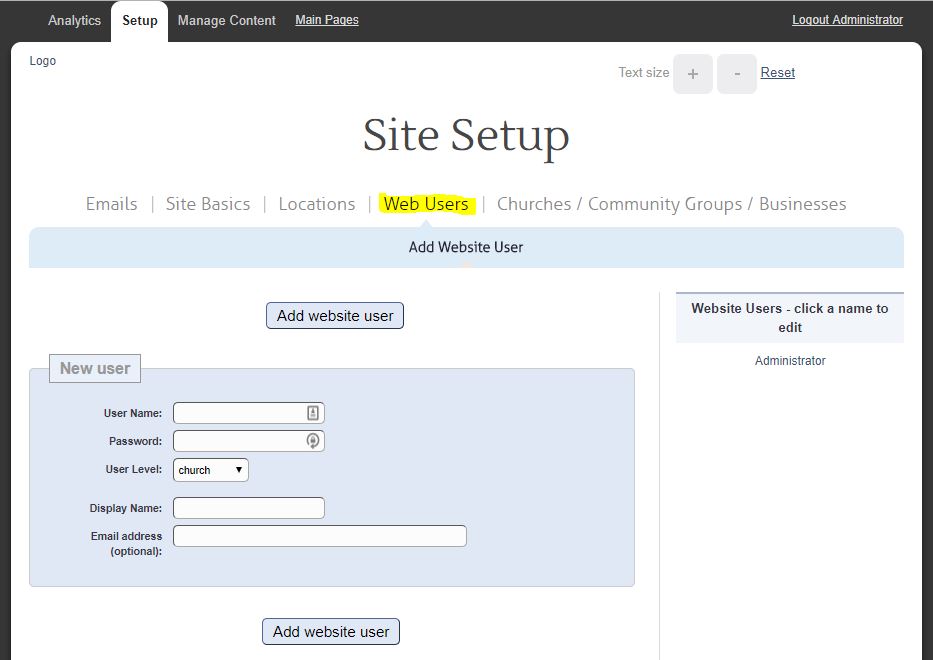
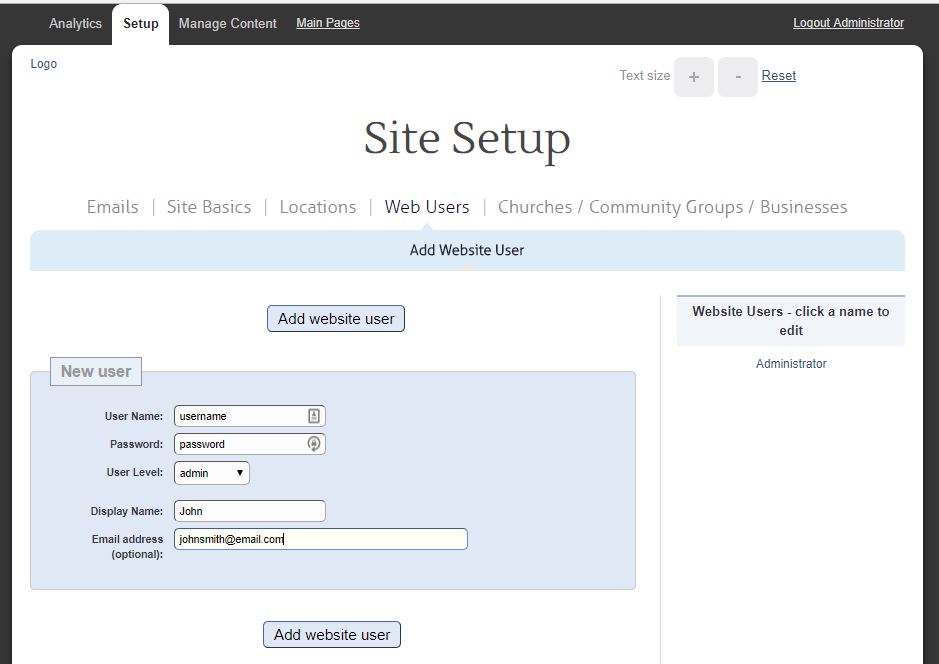
Add a new administrative user
Enter a username and password of your choice. Make sure you select "admin" user level from the drop-down list. Enter the name you wish to be displayed when you login.
NB: If you add an email as an admin user, then you will be notified via email about different things that might happen on your website. This can be changed at a later date. Add an email address if you'd like to.
Click on the "Add website user" button.
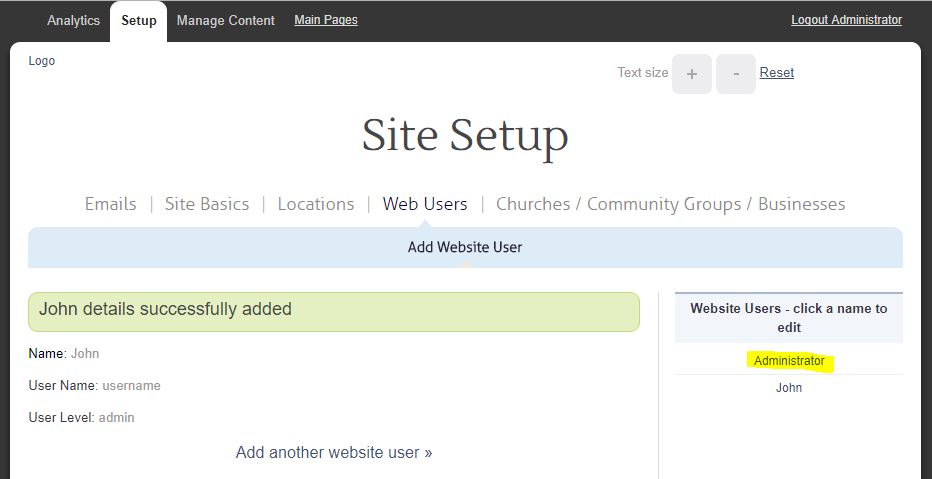
Edit default user
Congratulations! You have completed your first task in setting up your new website.
To make the site secure, we just need to remove the default admin user, so click on "Administrator" in the right-hand sidebar.
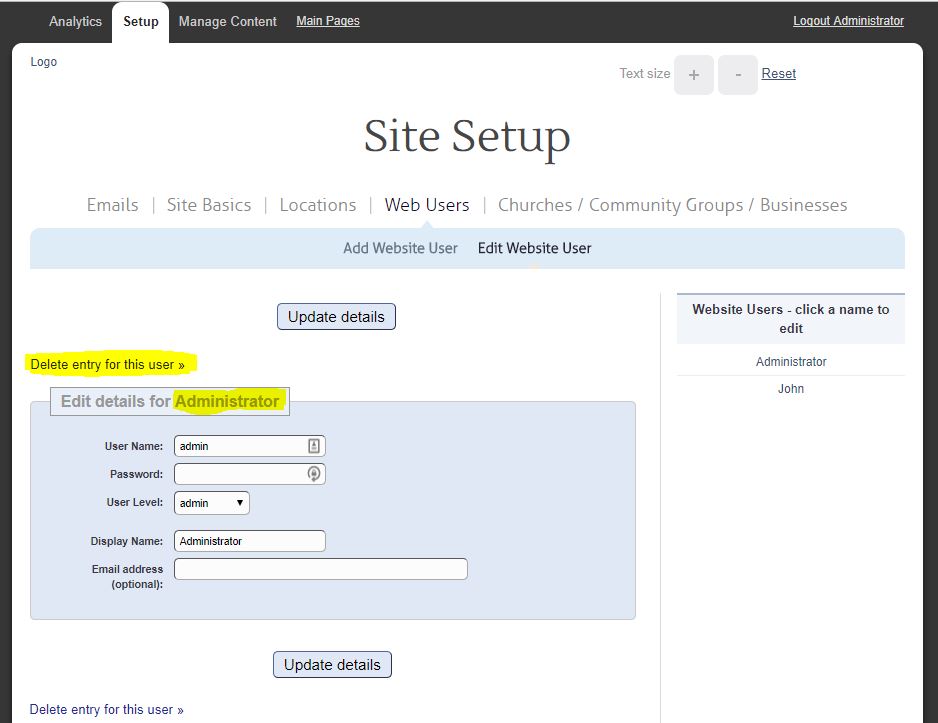
Delete default user
Once you've made sure you've clicked to select the default user named "Administrator", simply click on "Delete entry for this user".
Now your site is secured, and you're almost ready to proceed.
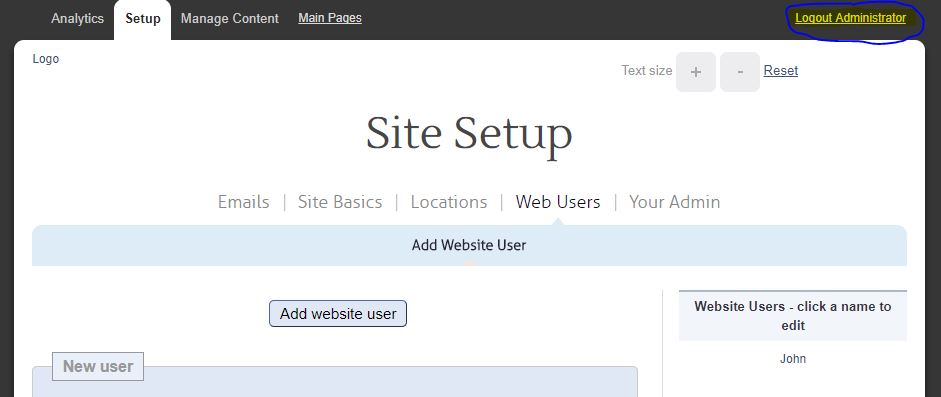
Logout
Now you've deleted the default "Administrator", you need to logout as that administrator.
Click on the "Logout Administrator" link.
Log back in
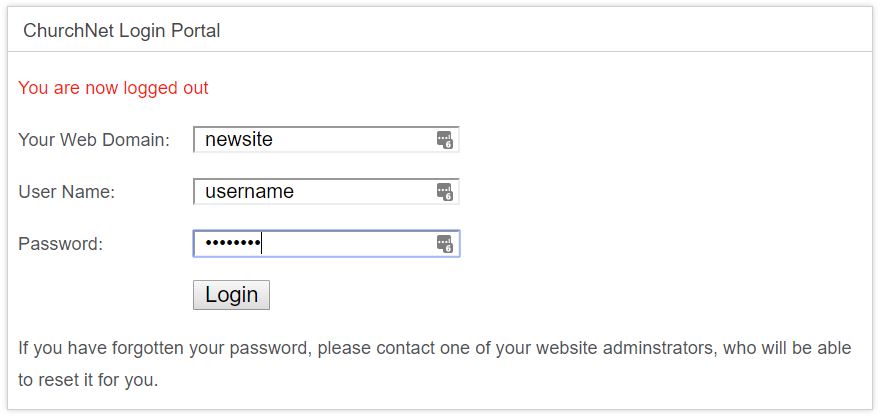
When you logout, you'll be taken back to the login screen.
This time enter the username and password that you selected for your new administrator, and click "Login"
2. Images
You should have prepared a folder on your PC, full of lovely images of smiling people and all that you want to show visitors to your website. Getting those images uploaded at the outset, in one block, will help ease the rest of the process of setting up your site.
NB There are FOUR special images, which you have to upload in a different way, described in the next section. These are the logo, favicon, welcome image and worship image. You might want to put images that belong to these categories in a separate folder on your PC.
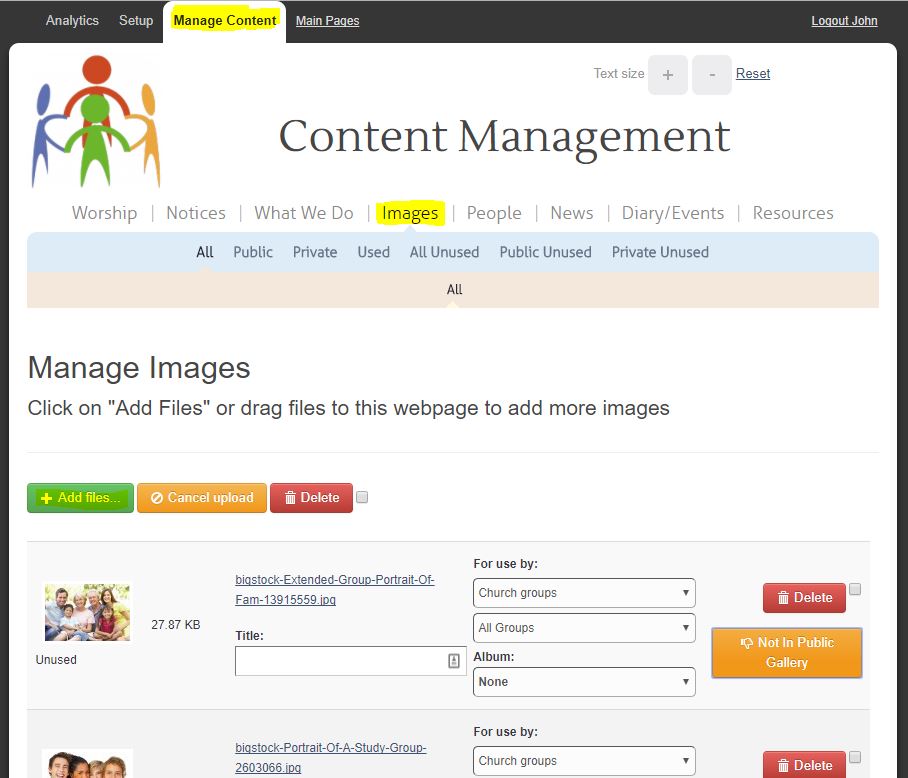
Navigate to the Image Management Section
- Click on "Manage Content" and then "Images"
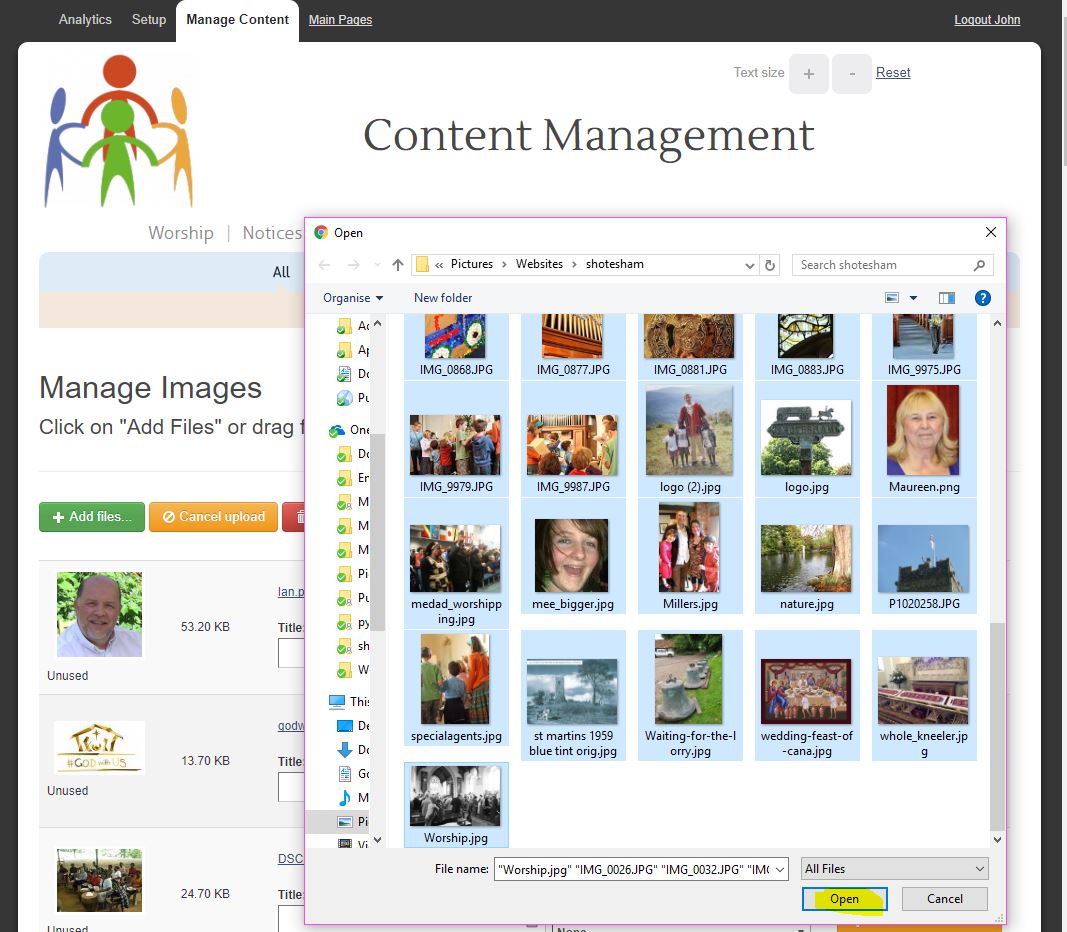
Select images to upload
To upload your images, do one of the following:
- Drag files from the image folder on your PC
- Or click on the "Add Files" button, browse for the folder, and select your images
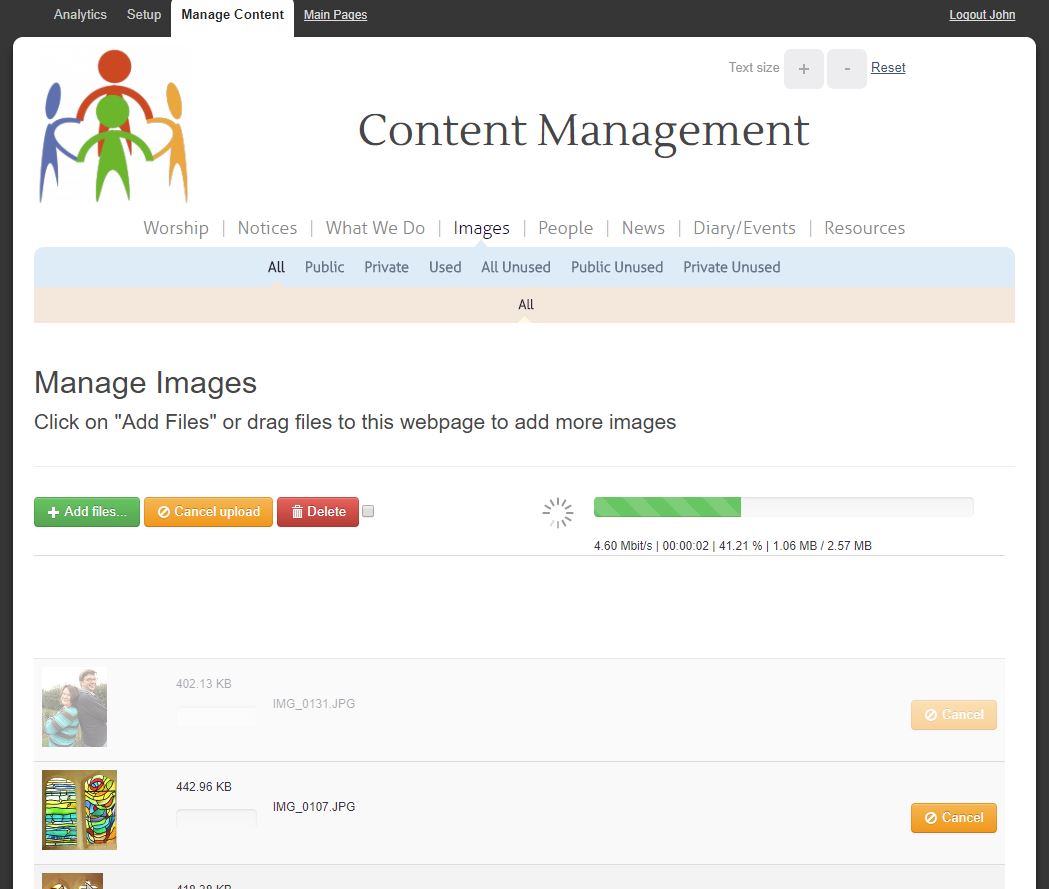
Wait for Upload to Complete
A bar will appear, showing progress for upload of all the images. Once individual images have uploaded, options will appear next to them.
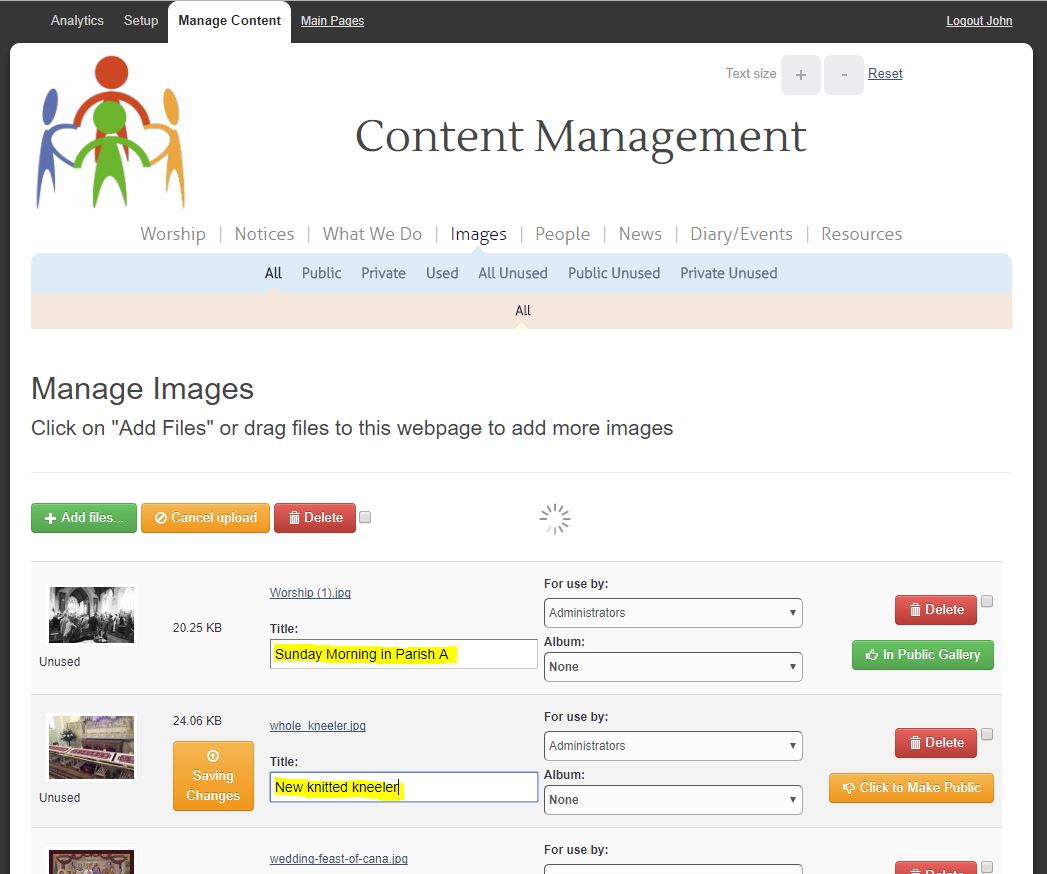
Further Details and Public Gallery
Optionally, you can add a bit more information about an image, or make an image public.
- You can click on the button to make the image appear in the public gallery
- You can add a title (description) to each image, which will appear in the public gallery
- You can limit which of your content managers is able to use the image
- You can create albums, and place images into albums
Changes are saved automatically.
3. Entering site basics
There is some basic information you need to frame your new website. Simply follow the steps below to get the ball rolling.
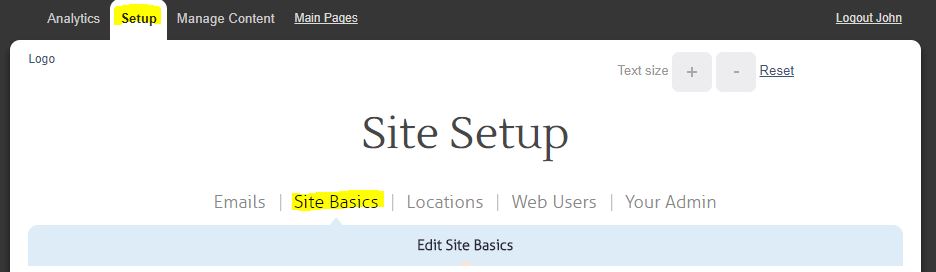
Note that steps 3-7 are all optional.
Under tab “Setup” click on tab “Site basics".
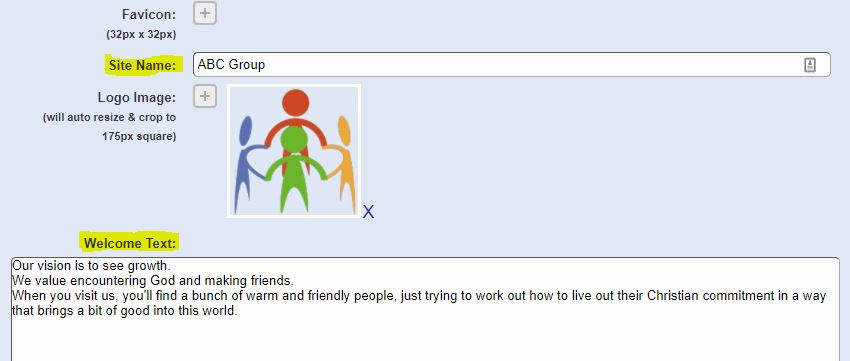
Enter the required pieces of text:
- Site Name
- Welcome Message
- Contact Phone Number
- Contact Email Address

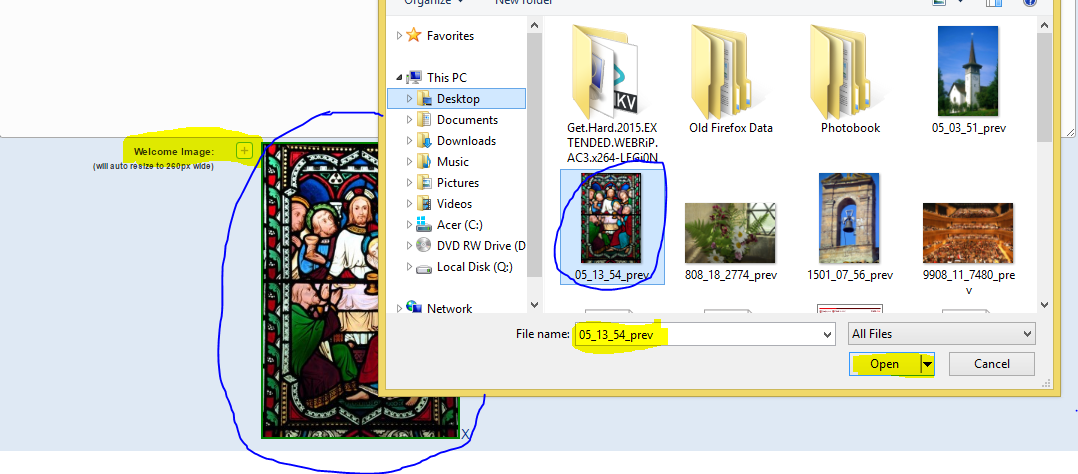
Upload Images
There are 4 types of image you can upload. For each type, you can upload as many images as you like from which to choose.
As an example we'll use the "Welcome Image", but the same method applies to the "Favicon", the "Logo Image" and the "Worship Image".
- Click the + sign in the grey square, next to "Logo Image". This will take you to your computer files.
- Double click the logo you desire from the image folder on your computer, where you've been gathering all your image files.
- Your image will now appear on your setup page, with a green border around it.
- If you want to select a different image that you have already uploaded, simply click on it. The green border indicates the selected image.
Optional Introductory Sentences
If you want to, you can enter the optional text in the relevant boxes.
- A sentence, introducing what you do, to appear at the top of the main home page.
- A sentence, introducing your contact form


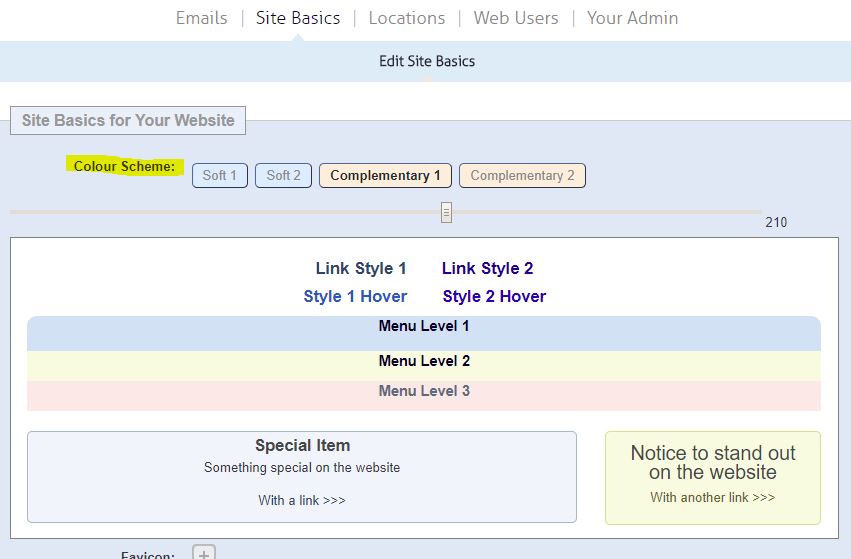
Optional Colour Scheme Adjustment
You can adjust the look of the site by playing with the colour scheme settings:
Adjust the base colour by moving the slider
Adjust the scheme, by clicking one of the buttons. There are a couple of "Soft" options, where all the colours on the site will be similar. Or there are a couple of "Complementary" styles, where the colours will contrast more.
As you play with the settings, a preview of how the site would look will appear.
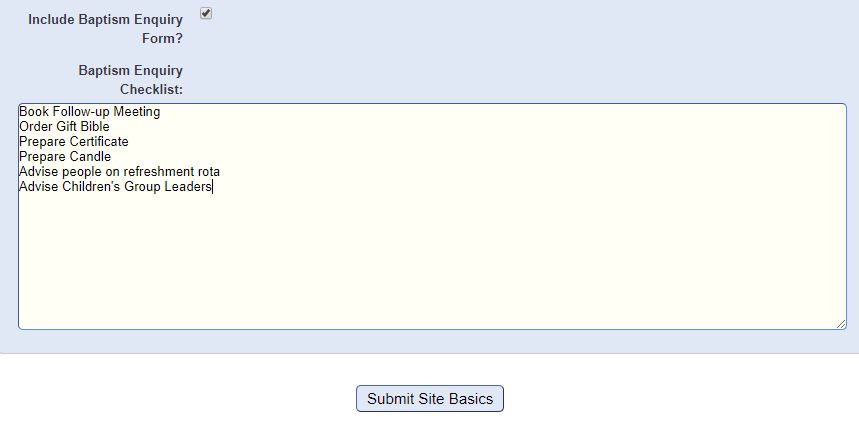
Optional Infant Baptism Contact Form
To offer your visitors a way of collecting personal information for an infant baptism, you can enable the baptism form by ticking the relevant box.
Once you've ticked the box, another text box will appear, in which you can write your checklist of jobs that need to be done after a baptism enquiry is received - e.g. "Book follow-up meeting; enter details in register; buy gift Bible; write certificate; etc."
When a family submit a form for an infant baptism, the mother and father will be emailed confirmation of the details they enter, using the email addresses they supplied, and an email will also be sent to the main website contact, with the details of the baptism, and the checklist of follow-up jobs.
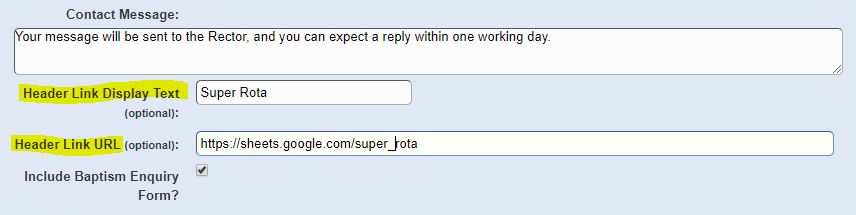
Optional Header Link
You can include a prominent link on your website, for ease of use for your visitors.
If you want to utilise this feature, simply enter the text in the two relevant boxes.
- The text you want to appear next to the top menu
- The URL to which you would like that text to link
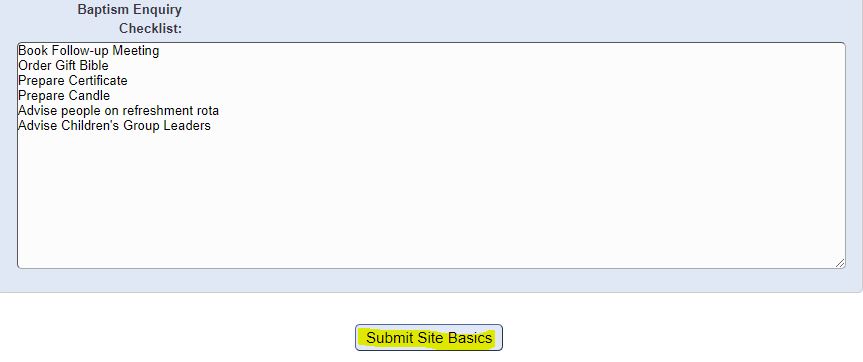
Submit the Form
When you're done, scroll to the bottom and click on “Submit Site Basics”
Check the information on the summary page that will appear.
Congratulations! You're ready to proceed.
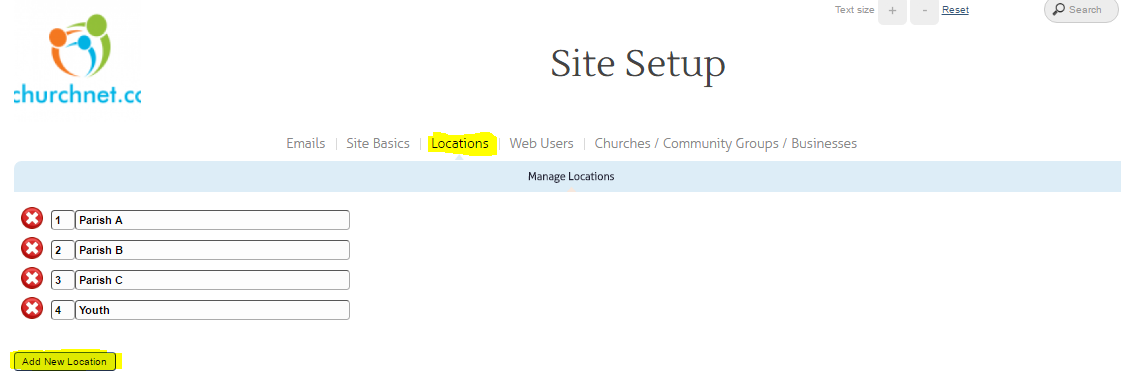
4. Inputting Locations
Under tab “Setup” click on tab “Locations".
For each location identified, click on the "Add New Location" button, and enter the location name.
5. Inputting Churches & Community Groups
Now we get into the meat of the build - adding all your churches and community groups, so each one has their own home page.
The process of adding details is identical for churches and community groups. Just follow the steps below.
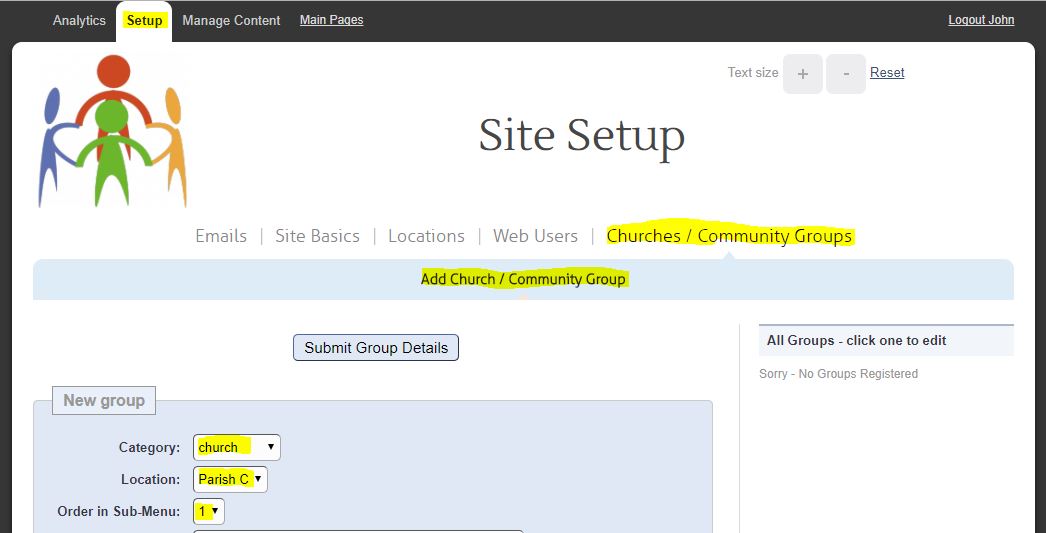
Under tab “Setup” click on tab “Churches / Community Groups".
- For each church and community group you'd like to include, click on "Add Church / Community Group"
- Under "Category", select whether it is church or community from the drop down box.
- Select the location which the church or group is in from the drop down box.
- The "Order in Sub-Menu" determines which order the churches and groups are displayed in for the chosen location. This is only relevant if there is more than one church or group in a location. This defaults to the end of the list.
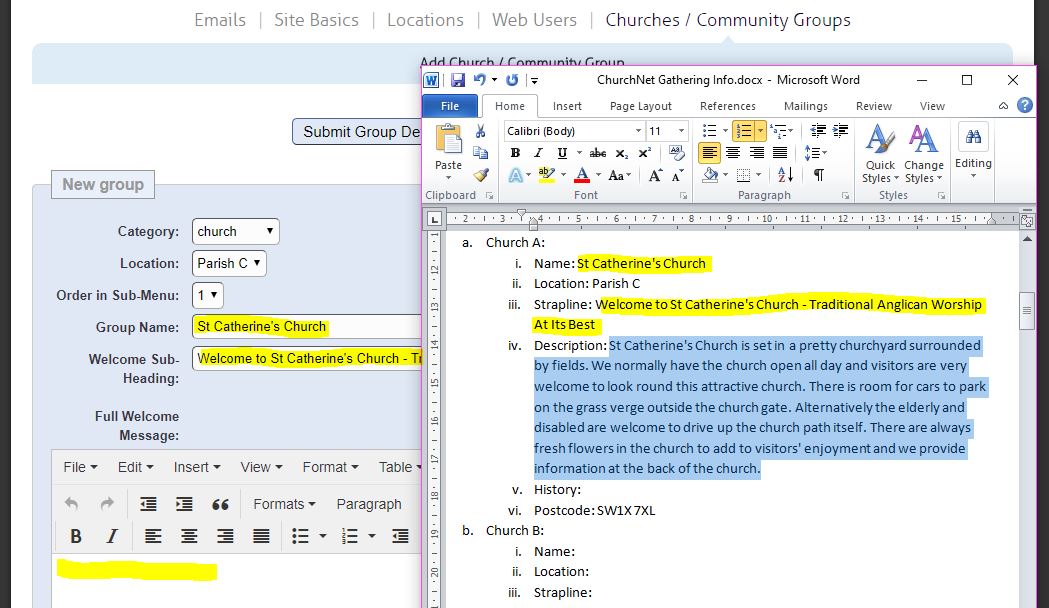
Copy and Paste Text
You should be able to copy and paste the text that you have gathered for each church or group to give each one:
- A Name
- A sub-heading
- A welcome message, or description
- Optionally, a history of the church or group (you might want to look at embedding images here, and using some more advanced html techniques, which you can read about in the "Advanced" section of this guide
- If you opted to include a map, then check the box to "Include directions"
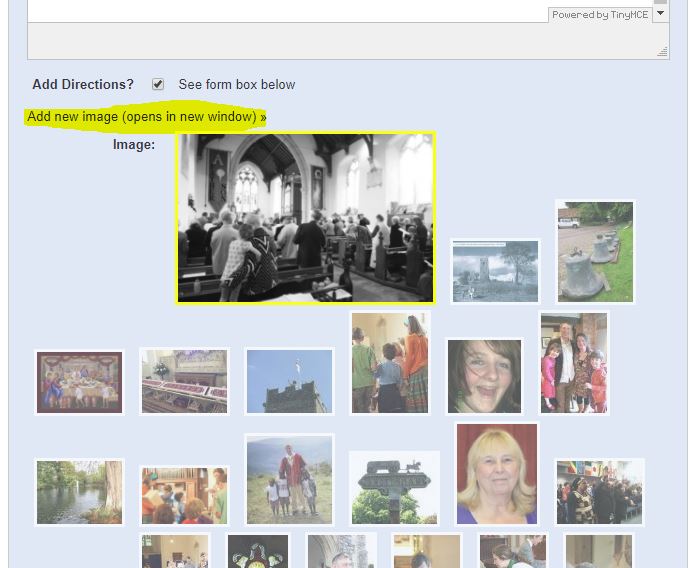
Add an image
- Simply click on the image for your church, which you uploaded earlier. The image will enlarge and you will see a yellow border to indicate it is selected.
- If you require a different image, you can upload a new one, by clicking on the "Add new image" link, which opens in a new window.
- Click on Add Files and choose your image from your computer, or drag the image to the new window. Once it has uploaded, you can close the upload window, and the new image should automatically appear in the form, pre-selected.
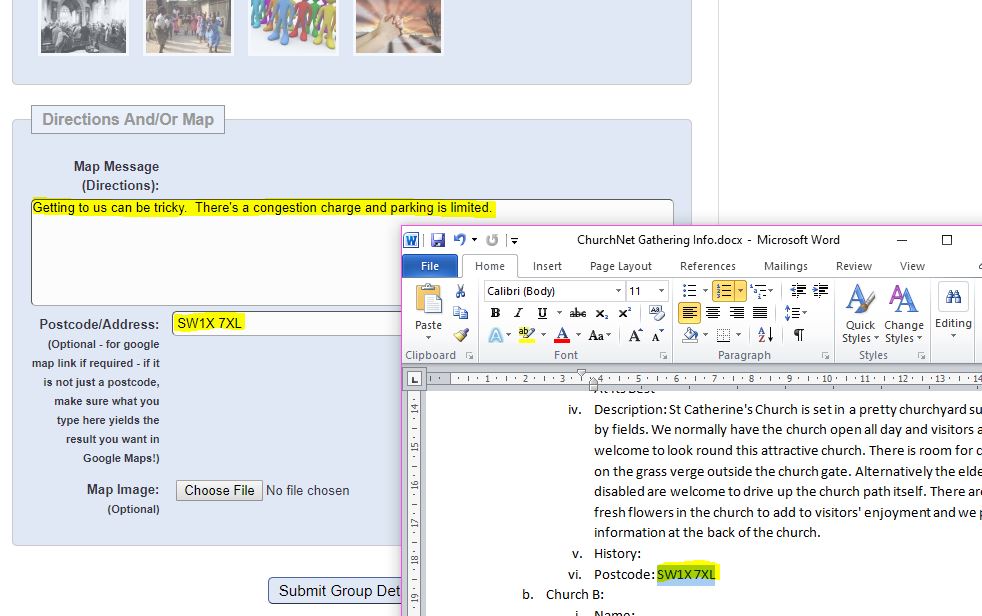
Adding postcode and directions
- If you ticked the add directions checkbox, then some more form fields will appear at the bottom.
- Enter postcode/address, and optionally some guidance on parking or anything else visitors should need to know.
- You can optionally add an image of a map by clicking "Choose file" next to Map image, and selecting the map image from your PC.
When you're done click on "Submit Group Details".
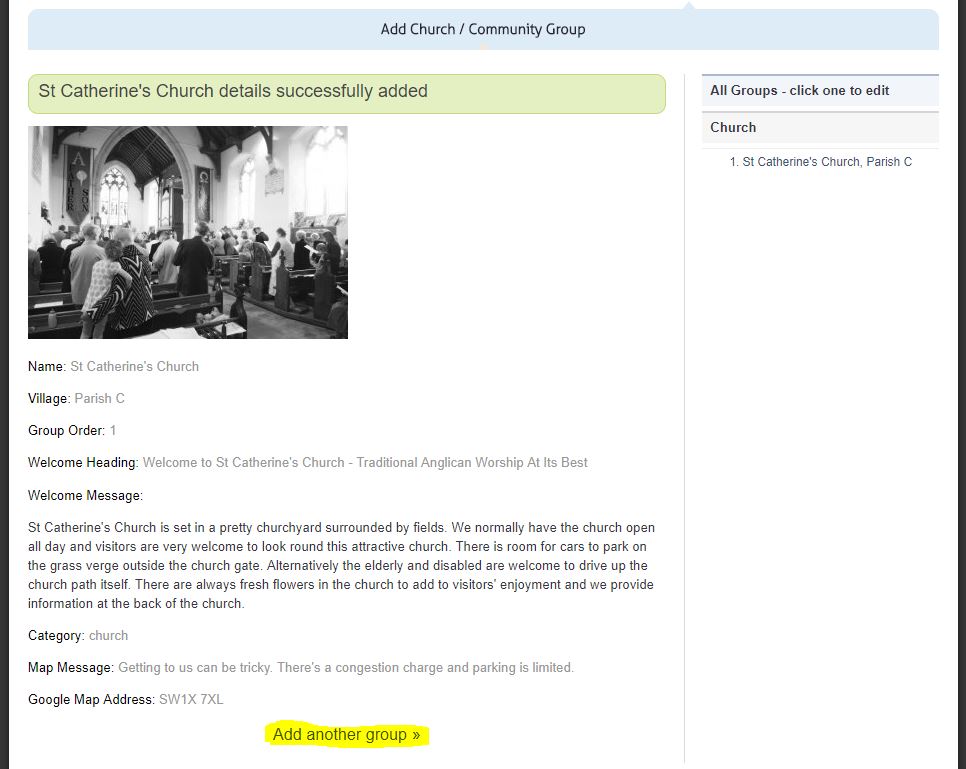
Completing and Checking Set up
When you have entered in all the information, click on Submit Group Details at the bottom of the page. This will take you to a screen that displays all the information you have just entered.
- To continue adding churches or community groups click on "Add Another Group" at the bottom of the page.
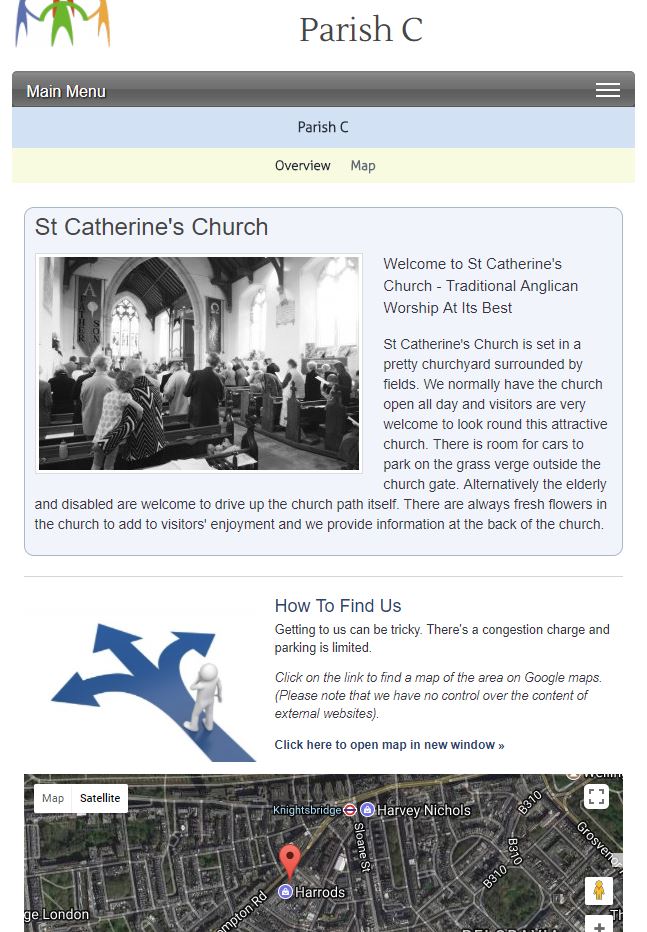
Check the public facing website
WELL DONE! You can now look at the web page to see how it will appear on your website.
Hold down
- To make any changes, go back to the Setup tab, click on the church or group you want to edit from the list on the right, make the change, and click on "Update Group Details".
6. Who's Who?
Inputting details for members of your core team to appear on the Who's Who home page for your group.
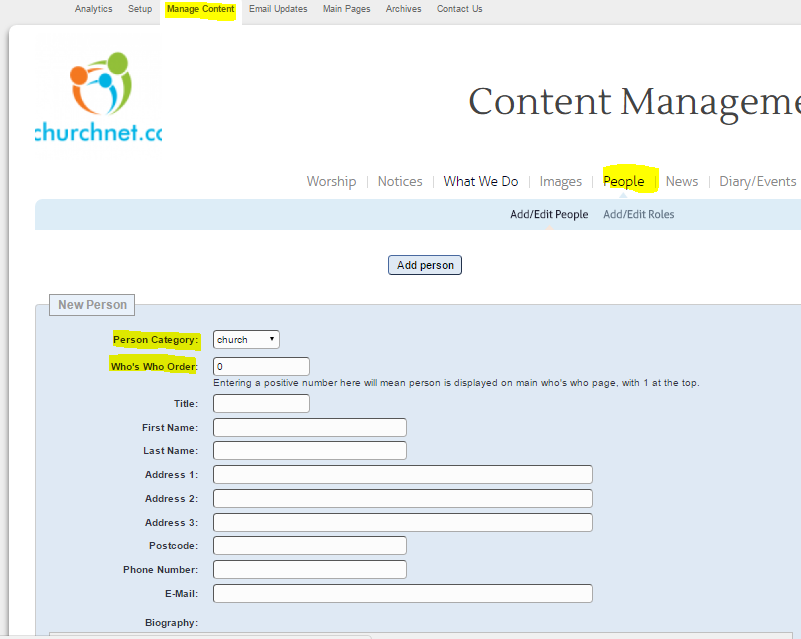
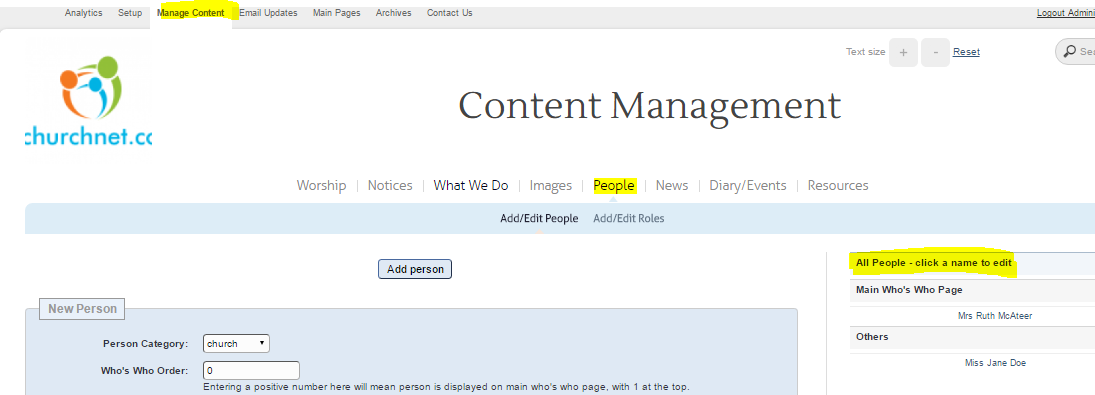
Under tab “Manage Content” click on "People", and then on "Add / edit people".
- For the Person Category box, choose church, community or business from the drop down menu.
- For the Who's Who order box, enter in the order you wish the people to appear on the main pages.
- NOTE : If the person does not have a main role in the whole group, but has a role in a church or community group only, enter in 0.
- Enter in the remaining details including a biography.
A number must be entered for a person to appear on the website.
Adding images 1
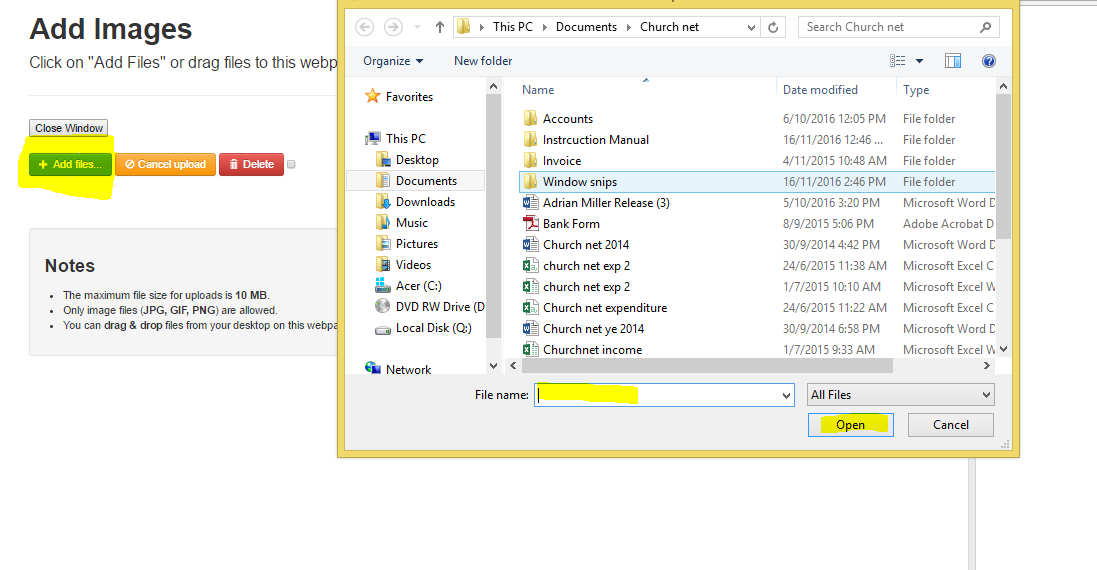
- Click on add new image (opens in new window). This will open a new window.
- Click on Add Files and choose your image from your computer. Click on open to upload it.
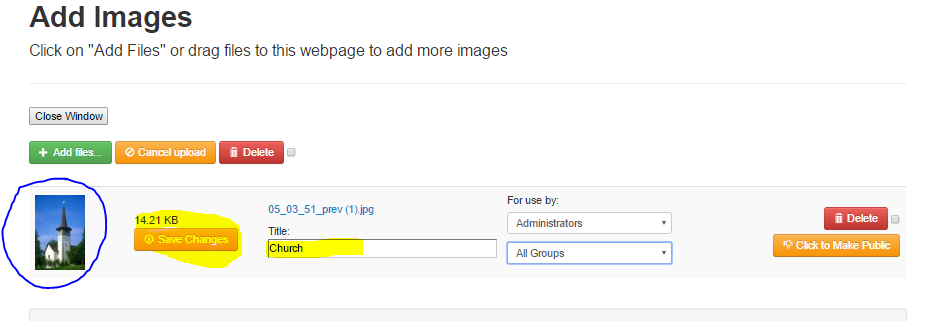
Adding images 2
- Once uploaded click on Save Changes. This button will then change Green and say "Changes Saved".
- To make public, click on Click to Make Public. This button will then change Green and say "In Public Gallery" .
- Finally click on close window.
Adding images 3
After you close the add images page, you are taken back to the Manage Content page.
Click on your image and make sure it is highlighted in yellow.
This image will now appear on the home page for this person.
Finally click on "Add Person" at the bottom of the page.

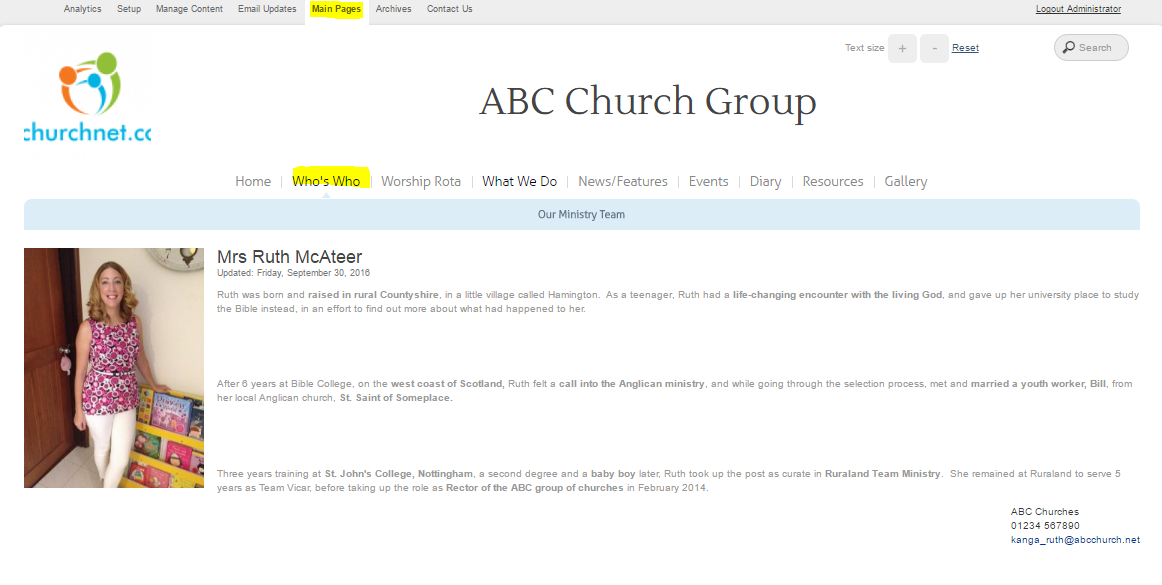
Check the Website
WELL DONE! You can now look at the web page to see how it will appear on your website.
Go to Main Pages at the top, and click on Who's Who.
To make any changes, go back to Manage Content, People, and choose your person from the right hand side. (See next slide)
Checking your people
Each time you enter a person, a summary page will appear. All people added will be shown on the right.
To make any changes, select the person from this list.
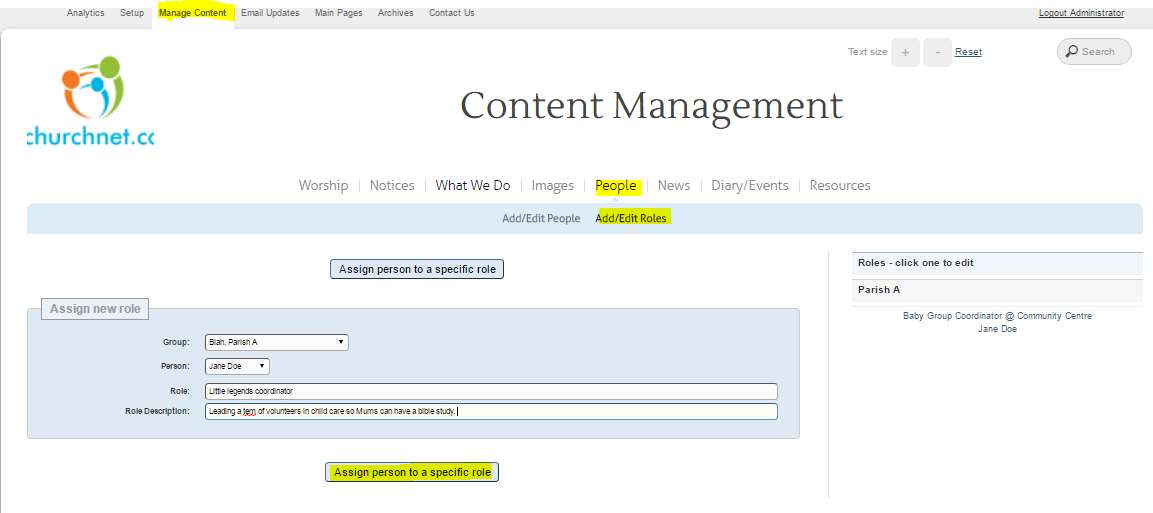
7. Who Does What?
Assigning people who only have roles in a specific church or group in a specific location to appear in the home page for that church or group.
Under tab “Manage Content” click on "People" and then "Add / edit roles".
- For the Group drop down box, choose the specific location this persons role is in.
- For the person drop down box choose the person (this person would have been set up in the previous step and assigned a value of 0).
- Enter in their role and their role description.
- Finally click on assign person to specific role.
Adding further roles
Once you have entered the information, a summary page will appear.
From here you can click on "assign another role".
Just like the people added, these roles will appear on the right hand side, enabling you to check and edit.

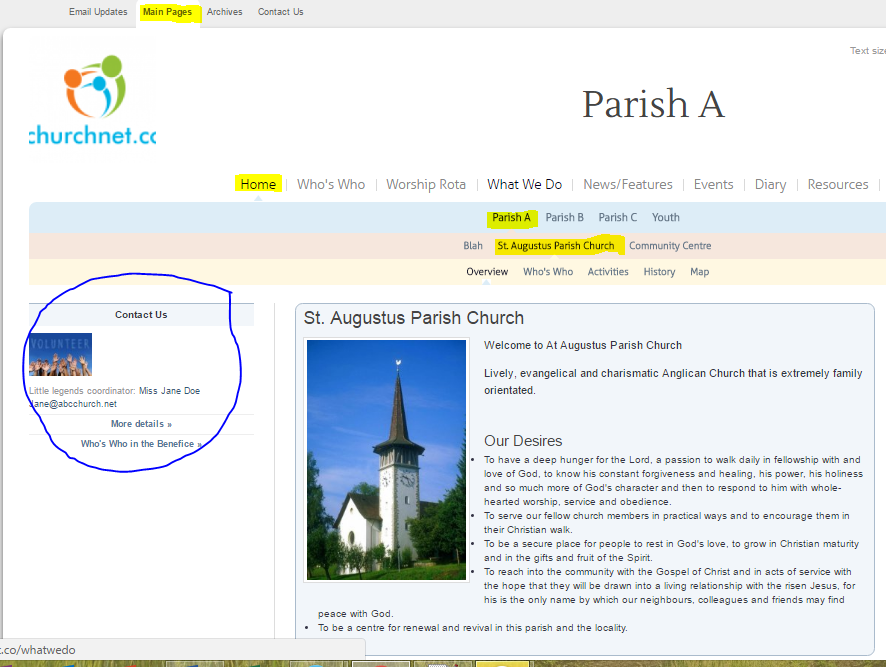
Check the website.
WELL DONE! You can now look at the web pages to see how it will appear on your website. It will appear in two places.
Go to Main Pages at the top, and click on Home.
Go to the Group location that this person is assigned within (eg "Parish A"), and the specific location they have been assigned (eg "St Augustus Parish Church").
They will appear on the left hand side in what is the Home page of this location.
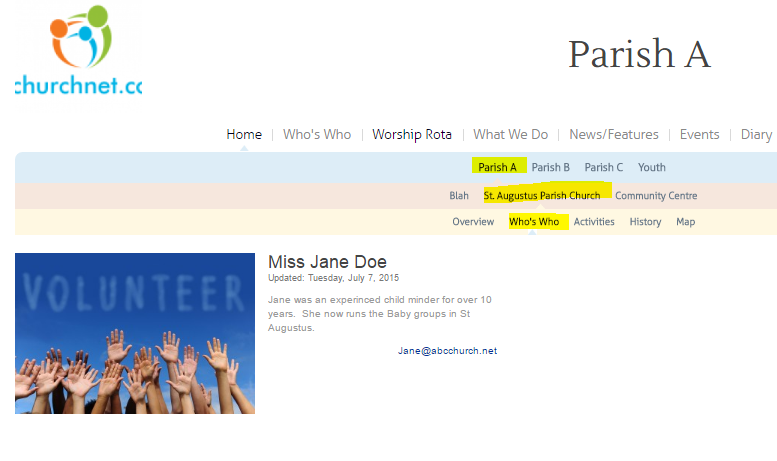
If you go to the Who's Who page, their full details will appear here. (see below second image)
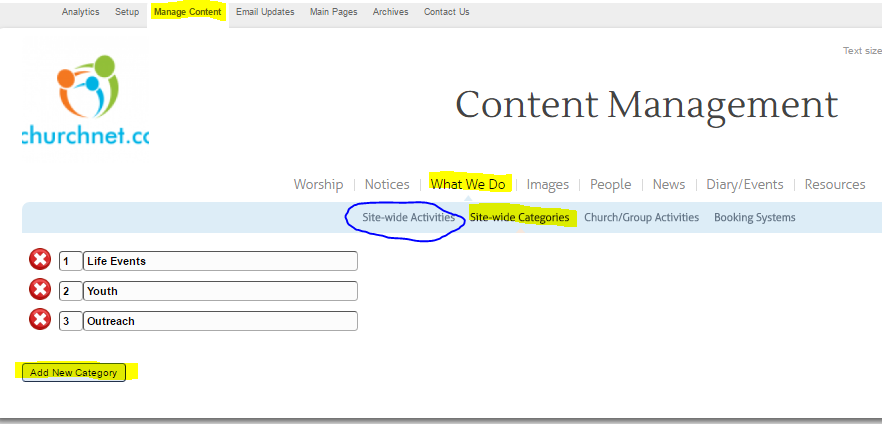
8. What We Do
Global Activities
Creating pages for Church actvities such as Weddings, Youth and Outreach.
Under tab “Manage Content” click on "What We Do" and then "Site Wide Categories".
- Using the information gathered in section 7 of the Preparation enter in your chosen core activities that happen across all or most of the locations.
- To add each new Category, click on "Add new Category".
- When you have added all your categories, click on "Site Wide Activities" at the top.
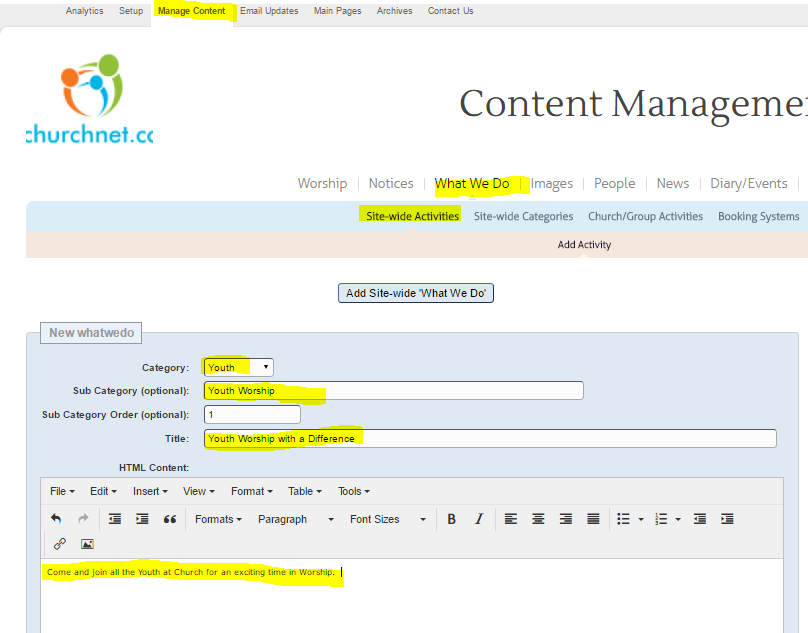
Adding site wide activities
- Choose a category (set up in previous section) from the drop down box.
- For Sub category, this must be filled in if you intend to have more than one activity in this category. For example "Youth" has "Youth Worship" and "Youth and Children's Group".
- For Sub category order, this is the order you wish the activities to appear under the main Category.
- For Title, write in your one sentence summary.
- For HTML Content, write in your full description.
- Then move onto images....
Adding images 1
- Click on add new image (opens in new window). This will open a new window.
- Click on Add Files and choose your image from your computer. Click on open to upload it.
Adding images 2
- Once uploaded click on Save Changes. This button will then change Green and say "Changes Saved".
- To make public, click on Click to Make Public. This button will then change Green and say "In Public Gallery" .
- Finally click on close window.
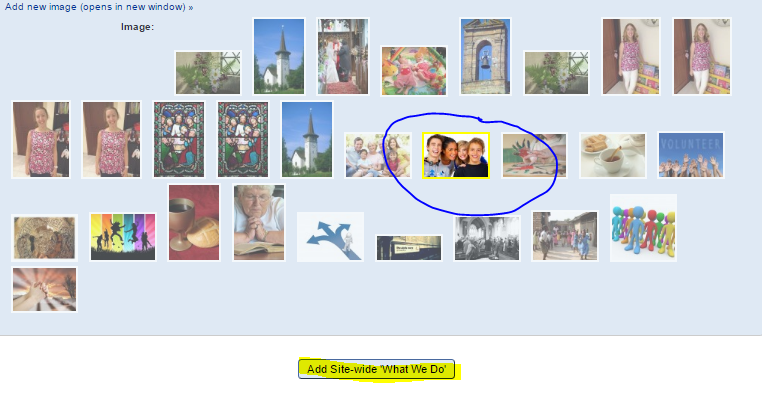
Adding images 3
After you close the add images page, you are taken back to the Manage Content page.
Click on your image and make sure it is highlighted in yellow.
This image will now appear for this activity.
Finally click on "Add Site-wide "What We Do" at the bottom of the page.
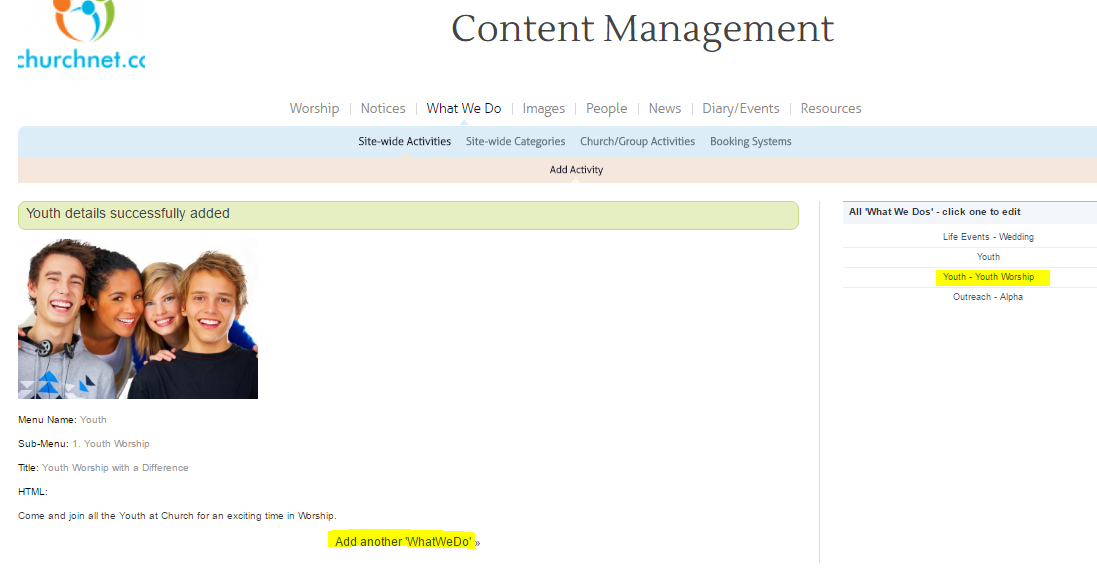
Adding further activities
Once you have entered the information, a summary page will appear.
From here you can click on "Add another What We Do".
Just like the people and roles added, these activities will appear on the right hand side, enabling you to check and edit.
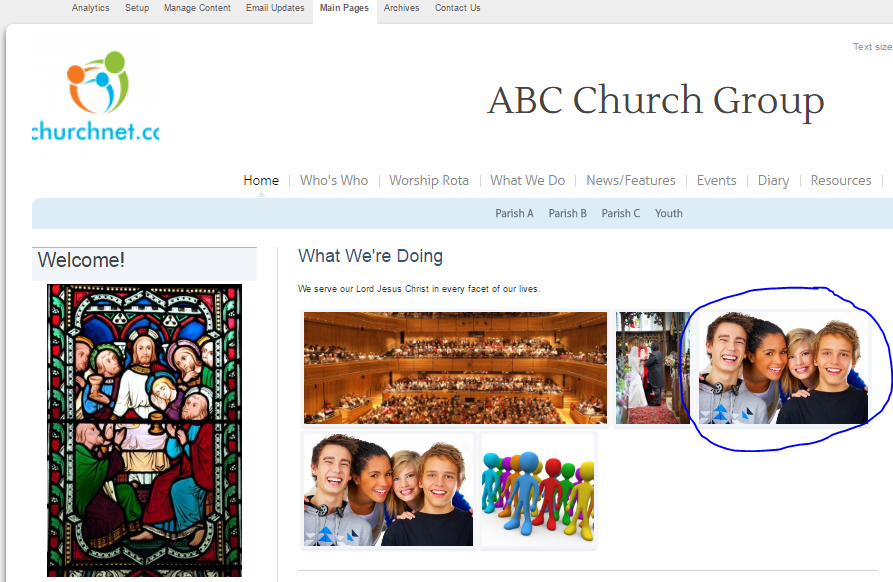
Check the website.
WELL DONE! You can now look at the web pages to see how it will appear on your website. It will appear in two places.
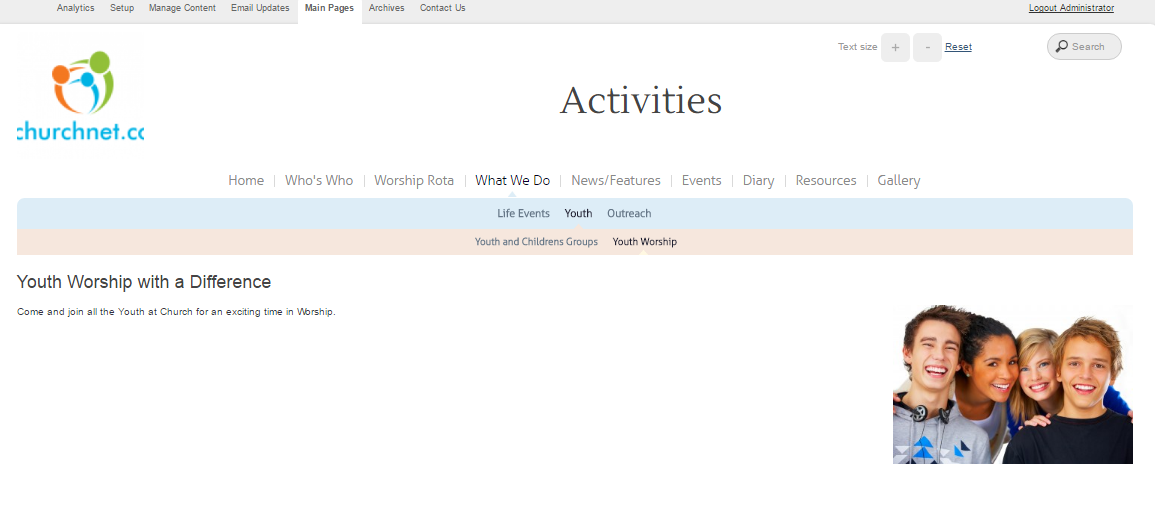
Go to Main Pages at the top, and click on Home, and you will see the image you chose for your activity appear. If you click on this image it will take you to the activities page.
Alternatively go to "What We Do" and choose the category (eg "Youth"), and the sub category (eg "Youth Worship").
Localised Activities
Creating pages for actvities associated with a particular church or group, such as bell ringing or flower arranging.
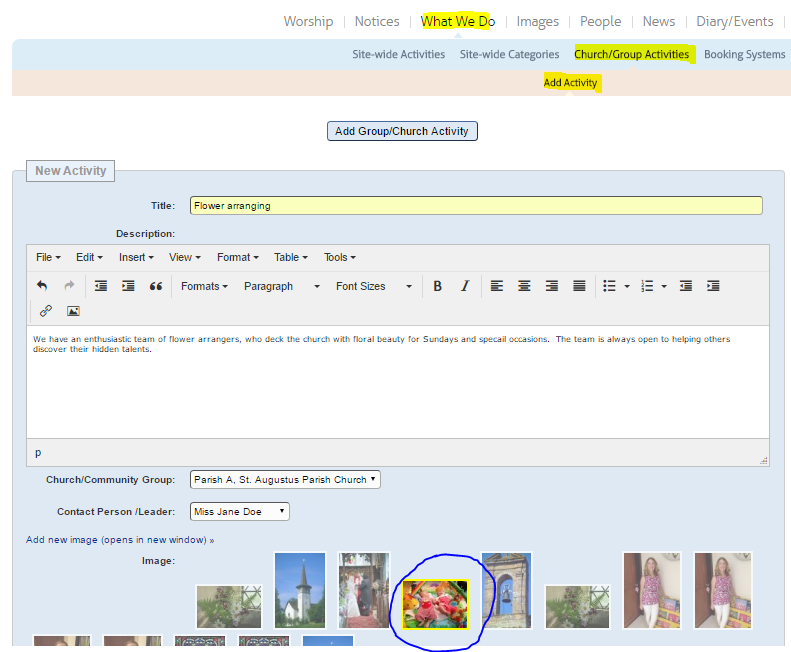
Under tab “Manage Content” click on "What We Do" and then "Church/Group Activities".
- Using the information gathered in section 7 of the Preparation enter in your chosen stand alone activity for a specific locations.
- Enter in the Title and Description.
- Choose the location this activity takes place at from the drop down menu.
- Choose the person responsible for this activity from the drop down menu.
- Add an image in the usual way.
- Click on "Add Group / Church Activity".
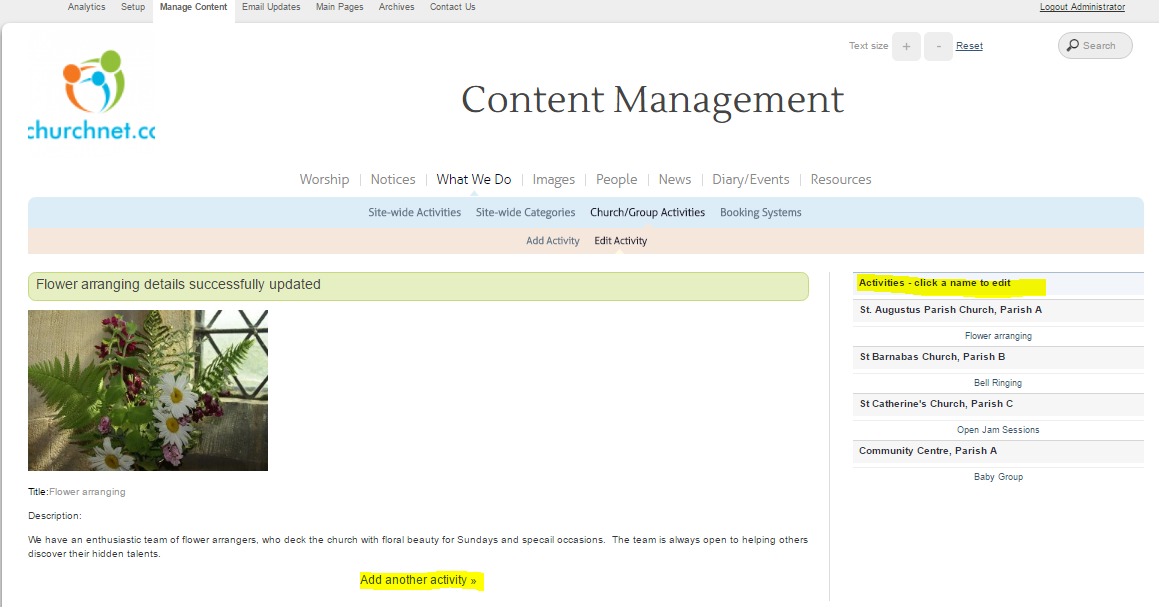
Adding further activities
Once you have entered the information, a summary page will appear.
From here you can click on "Add another activity".
Just like the people and roles added, these activities will appear on the right hand side, enabling you to check and edit.
Check the website.
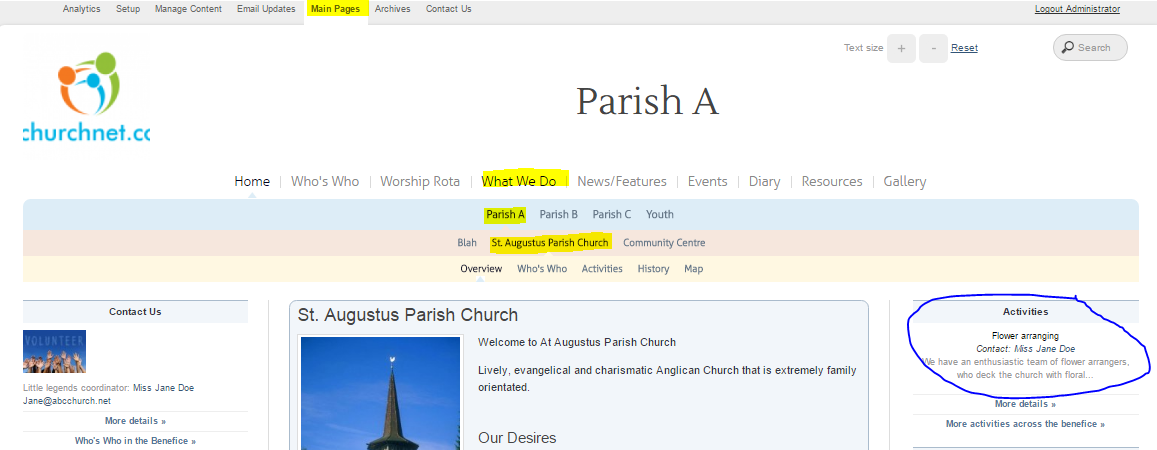
WELL DONE! You can now look at the web pages to see how it will appear on your website. It will appear in two places.
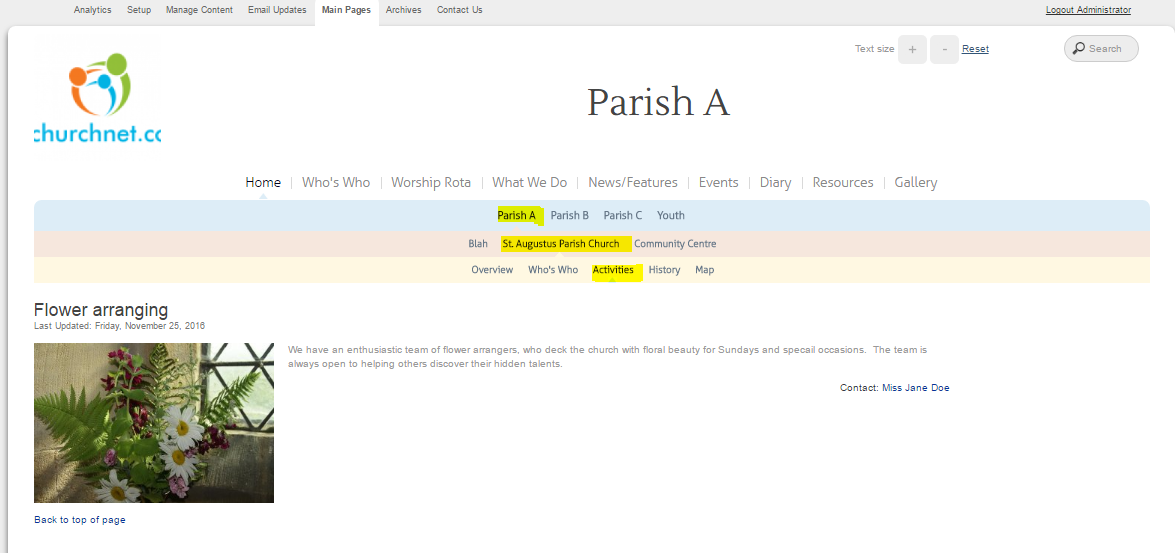
Go to Main Pages at the top, and click on Home, then the Group Location (eg "Parish A"), and the specific location the activity is at (eg "St Augustus Parish Church").
The Activity will appear on the right hand -side. Click on "more details" to go to the page for the activity.
Alternatively click on "Activities" at the top. This will also take you to the page for the activity.
9. Add More Website Content Managers
If you have more than one web user, who will be managing content on your site, you may as well add them now, while you're in the right place.
Go to Setup pages, and click on Web Users. The New user form will appear.
Enter a username and password of your choice. Make sure you select "admin" user level from the drop-down list. Enter the name you wish to be displayed when you login.
Finally click on Add Website user.
Repeat for all Administrators you need to add.
10. Regular Pattern of Worship
The regular pattern of worship will assist in populating your actual service rota, when it comes to keeping the content up-to-date.
Go to Setup pages, and click on Worship.
11. Emails
You can add individual and group email addresses, to be used with the ChurchNet mail server.
Go to Setup pages, and click on Emails.
CONGRATULATIONS!
You have now entered in all the basics to launch your new website.
Now you can move on to what you need to do to maintain the information for all your various churches and communities on your new online space!
Click here to proceed