Introduction
Before getting technical, you need to gather a set of information that you can then plug into the website to get you going. Here we outline precisely what that information is.
Remember, your website will only ever be as good as the content you provide. Content is king.
Click here to download a Word Document, to help with information gathering
1. Gather Images
It is best to have as many images on your website as possible.
You will need images of your church, the buildings, the people, events, worship, baptism, weddings and anything else that you do. To help you gather a database of images to incorporate as you build your website, try the following:
Spend a Sunday taking photos of everything that happens!
Ask parishioners to send you their photos
Make use of the high-quality free-to-use images supplied with your Churchnet website.
-
Browse some websites that offer free images
Consider purchasing some images to give you more choice
A website that specialises in high quality faith-focused stock images is lightstock.com
SAY CHEESE!
Smiling people make the best images! Don't overload with pictures of buildings.

2. Site Basics
Laying The Right Foundations
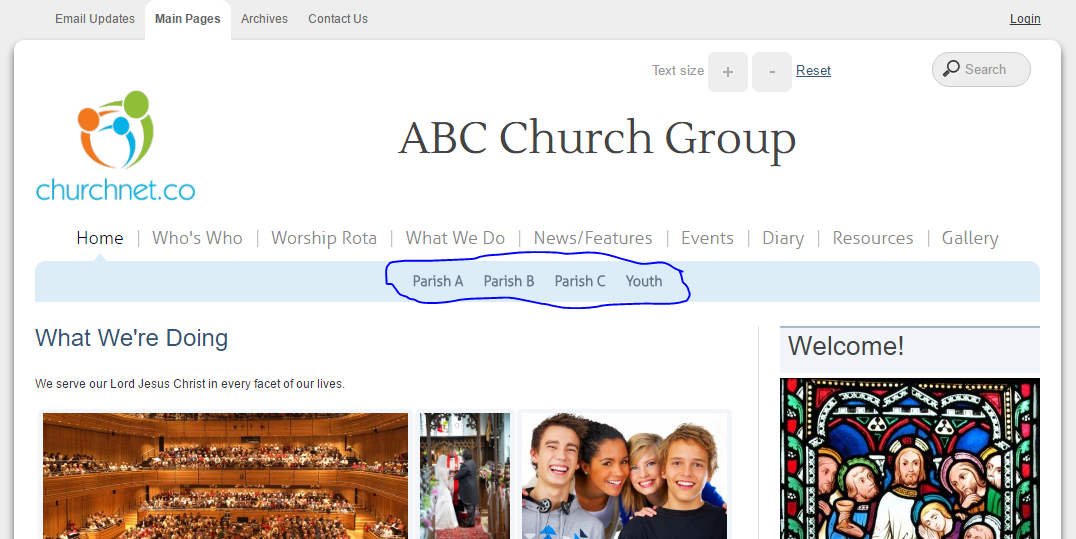
Your new website will need some basic information to tell visitors who you are and how to get in touch. This can include some degree of branding with the use of colour and images.
Your website will need a name - perhaps the name of your benefice.
You'll be asked for 3 main images, so you should think about putting into your image folder an image for each of the following:
- A Logo - see more on that below
- Something that sums up the whole website, for a welcome image
- Something that represents the worship that happens in your patch
You'll need to decide which contact phone number and email address you want as the main website contact.
You need to include a few paragraphs that you'd want to say to a visitor to the site to explain what you're essentially about. This is your welcome message. You might include what your vision is, what your values are, the sort of things you're doing, what visitors to your churches could expect to encounter, and so on.
You can opt to include a sentence, introducing what you do, for the top of your homepage, and/or an introductory sentence for your contact form.
You'll have the option of using your website to collect information for baptisms, so you need to decide whether or not you want to have a special baptism enquiry form available to your visitors.
Finally, you'll have the option of including a prominent link, which might be to a set of shared documents on a different website, as a shortcut to a special page you want to have on your website, or something else.
So what do I need to do now?
For now, all you have to do is:
- Decide on a name for your site
- Decide which email and phone number you want as the main website contact
- Write a welcome message
- Decide whether or not you will make use of the baptism contact form
2. Identify Key Locations
Which Locations?
This will most commonly be the locations of the different parishes that all fall under one vicar, giving you a website for a whole benefice.
Locations will appear as separate headers to click on, on the Home Page, News/Features Page, Events Page and Diary Page. This enables you to have several parishes - each with different churches, chapels and community groups - all on one website.
Having everything connected and yet each with its own space helps ease communication, and makes it easy to see and maintain relevant content.
These locations could, however, be used in other more creative ways. For example they could be used figuratively, to represent different ministry areas in one large church; different areas of the world in which a missionary charity is operating; or whatever fits the model. Let your imagination loose!
In this case 3 parishes (A-C) represent geographical locations and 'Youth' represents a figurative location - an area of activity. Grouped together the website is for the multi-parish benefice "ABC Church Group".
So what do I need to do now?
For now, just jot down the key places where you are active, within which you find your churches or community groups.
3. Churches & Community Groups
Each Parish Church will have its own pages within the main website, attached to one of the locations.
For each church, you will need to obtain:
- A photo
- A strapline
- A short description
- A written history if desired
- A postcode if a map is required
GOOD NEWS FOR MISSION!
Schools, parish councils, village halls, sports clubs - in fact any community groups - can also have their own pages attached to a specific location. This enables churches to offer a valuable community service if desired. Even if groups don't actively update their area, they could have a static page with a link to their own site - this would provide a helpful catalogue of community activity.
If you want to include community groups on your website, simply gather the same details as for the churches. Or you can think about adding them later on.

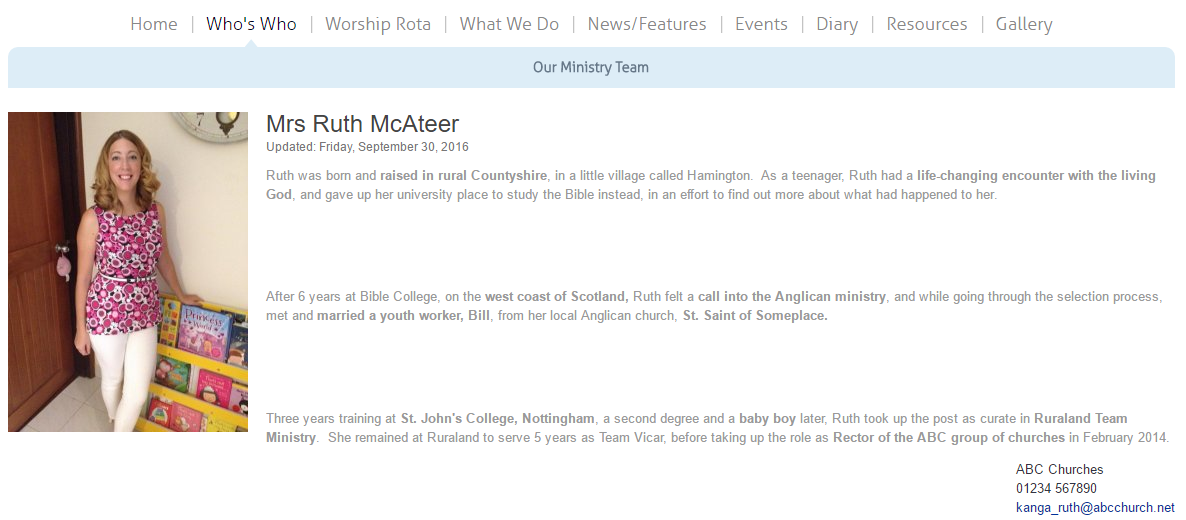
4. Who's Who
Website Wide Core Roles
Identify core people to appear on this page, e.g. Rector; benefice administrator; website administrator; other benefice staff.
For each person, you will need to obtain:
- A photo
- Contact details
- Optionally, a short biography
Church/Group Specific Roles
Individual churches and community groups within each location will also have a Who's Who page for people associated with them.
You will need the same set of information as above (photo, biography, contact details) for each of these people. In addition you can set roles for people within a particular group or church.
Some people might have multiple roles, across a whole benefice as well as in 1 or more groups. For instance, the benefice website administrator might be PCC treasurer for one church and scout leader in the community.
So what do I need to do now?
For now gather your list of people, with their details, and job titles for any specific churches or groups.
5. What We Do
Website Wide Activities
Identify core activities that happen across all or most of the locations.
For each activity:
- Obtain an image
- Write a one sentence summary
- Write a full description
- Categorise the activity
- Optionally, sub-categorise the activity
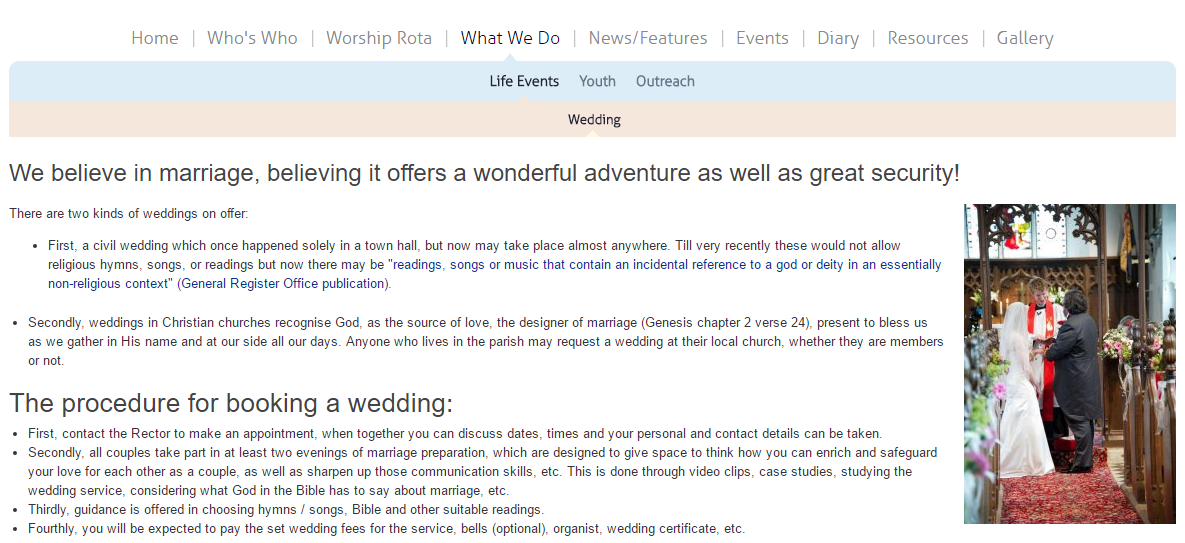
If a set of activities groups together, you can define a top-level category for them, and assign different sub-categories. For instance, you could start with top-level categories such as "Life Events" to include activities such as Baptisms, Weddings & Funerals; or "Courses", to include Alpha, Parenting, etc.
Remember, this is for all or most locations, so think about things open to people in all locations (e.g. courses, youth clubs, etc.); or things common to all or most locations (e.g. baptisms, prayer, etc.)
Groups of Activities
This example is for the category "Life Events" and sub-category "Weddings":
Standalone Activity
This example is where there is just one category for "Youth" with no sub-categories needed:

NOTE!
These pages are entirely independent of locations
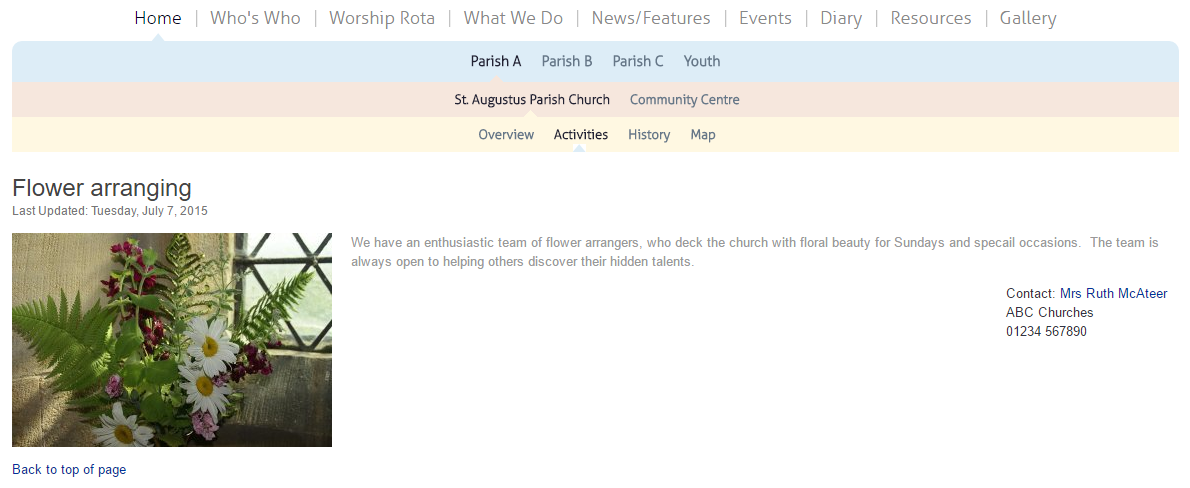
Church/Group Specific Activities
You can also add specific activities for individual churches or community groups within specific locations.
For example, you may have flower arranging or bell-ringing that only takes place in one church. These activities can be attached to that church.
For each church/group activity:
- Obtain an image
- Write a one sentence summary
- Write a full description
A Church Activity
This example is for flower arranging in St Augustus Church:
6. Web Users
Think about who will be updating your website.
You might channel everything through one website administrator, or you may prefer to have a number of content managers, or "web users", for which the ChurchNet system makes ready provision. These web users can be assigned different levels of access.
There are 3 kinds of web users possible:
Administrative Users
These can access all areas and can utilise all featuresChurch/Community Content Managers
These are able to manage content for all churches or all community groups - but are not able to access the site setup pagesIndividual Church/Group Content Managers
These are only able to manage content for one specific church or community group. If that's all they're going to be doing, this keeps it simple for them and safe for you.
So what do I need to do now?
Make a list of all the people you want to be able to update the site and choose a level for them.
7. Worship
Make sure you have to hand your regular pattern of services for each parish.
For example, you may have a monthly 8am BCP Communion service at one one parish, and an afternoon Cafe Church twice a month in another parish.
The system allows for weekly or monthly patterns.
So what do I need to do now?
Make a list of all the regular services that happen in each parish, noting the following:
- What the service is
- If it is monthly, which week of the month. If weekly, which day of the week.
- Where it is
- When it starts (and optionally finishes)
- Who usually leads
8. Emails
The ChurchNet system provides a facility for any number of email addresses for your domain.
If you are transferring email addresses from another host, this will have to be managed quite carefully, and you will be advised and supported through this process. If you are setting up new email addresses, all you need to do is choose what addresses you would like.
If you already use an external email provider, like G-Suite or Office 365, this can be integrated into the ChurchNet website. You will need to note your SMTP access credentials.
So what do I need to do now?
- Make a list of existing email addresses to transfer
- Make a list of new email addresses you would like
- Choose passwords for each email address (both new and old)
9. Create A Logo
Why?
A logo is an important element of branding, and gives people an instant visual clue as to who you are. It is an opportunity to communicate something about yourself.
The website displays your logo at the top left-hand corner on all pages. The site comes with a default image, but this can be changed to make the site personal to you and reflect your identity.
How?
If you don't already have a logo, there are various ways to go about getting one:
- There are services that will design a logo for you, at a cost of anything between £5 and £100s
- There are free online logo creators
- There's a range of software you can install on your computer - or you might find you already have software that could do this
- You could ask a friendly graphic designer, perhaps from your congregation, to design one
PLEASE NOTE!
The site requires your logo to be a square, optimally sized at 170px by 170px. Some cropping will occur if it's not square.
10. Create A "Favicon"
A What?!
A favicon is a small graphic associated with a particular website, typically displayed on the open tab within a browser accessing the site or next to the site name in a user's list of bookmarks. Your website comes with a default favicon, but you can replace it with something of your own.
How?
If you don't already have a favicon, you can create one quite simply using a free online tool. Either design something from scratch or upload a standard image - a good idea is to start with your logo. Just remember that because it is very small, any detail in an image will be easily lost. You can always experiment, and see what you come up with.
HINT!
Try www.favicon.cc to help you on your way.
CONGRATULATIONS!
You have now gathered all the information you need to launch your new website.
Now you are ready to start getting a little more technical and transfer the information for all your various churches and communities into your new online space!
Click here to download a Word Document, to help with information gathering
Click here to proceed to 'setting up' section